
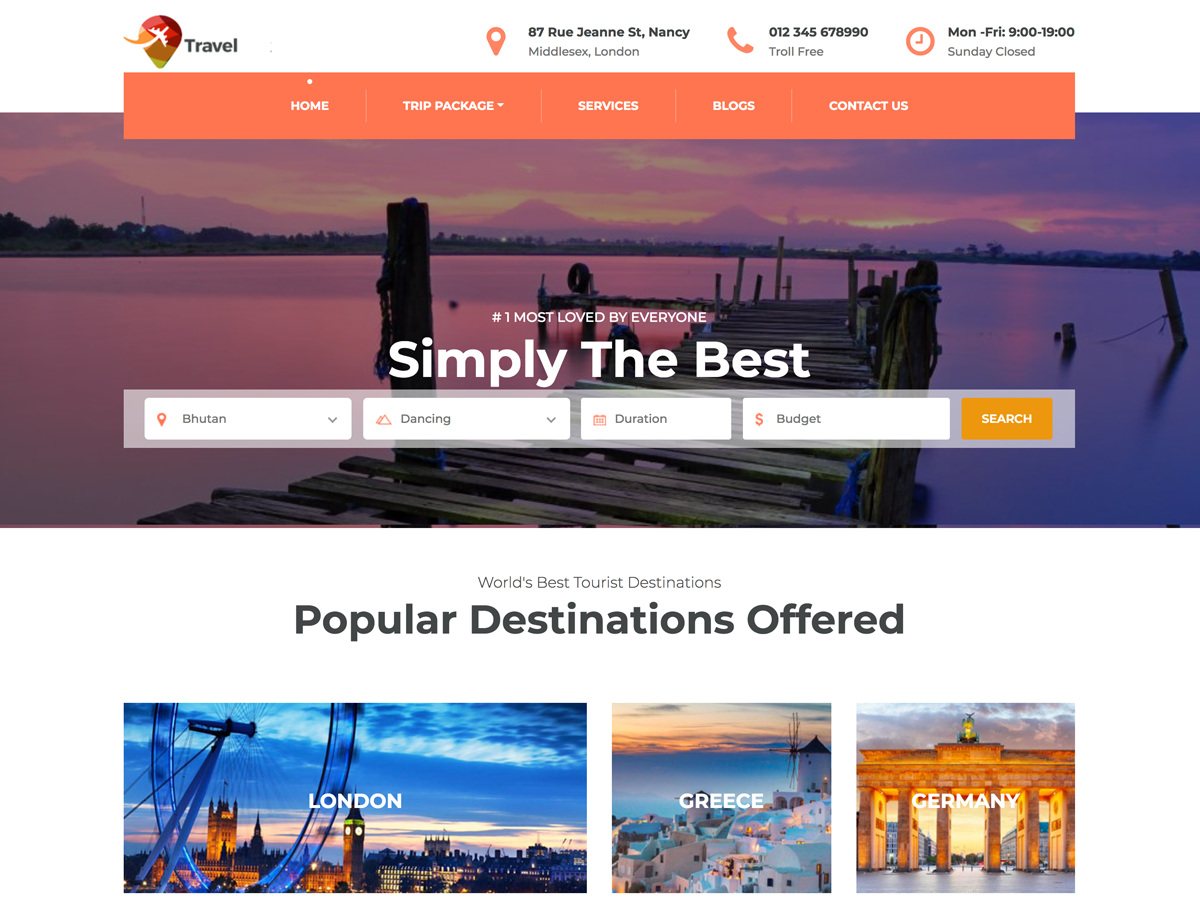


Travel Company is a free WordPress theme to create travel booking website for tour and travel companies. You can add trips, destinations, and trip types, feature travel activities, highlight your specialties and allow visitors to book the trips. The stunning design combined with modern CSS effects and animation will make your visitors feel like they are already on a trip. Travel Agency WordPress theme is speed optimized, SEO-friendly and mobile-friendly
Theme Highlights
- Latest Bootstrap Framework
- Fully Responsive
- Slider, Carousel
- Scrolling Animation
- Youtube Video Background
- W3C Markup Validation
- Photo Gallery
- Hover Effect
- Smooth Design
- Retina Ready
- Clean & Awesome
- 24/7 Friendly customer support
- Well Documentation
- SEO Friendly
- Translation Ready
- One Click Demo Import
Travel Company theme is for you if :
- You are using WordPress to build your travel and tour company’s travel booking website for free without writing a single line of code.
- You are looking for a free web template to display the travel services (destination, trips, activities, adventures, etc.) on your website.
- You run a travel or tourism company or agency and want to show your visitors why you are the best.
- You want a travel website that displays travel destinations, tour packages, the complete itinerary of a trip, the activities one can do in those locations, the cost of the trips, and other details.
- You want a clean, responsive, SEO-friendly, and speed optimized website for free.
- You are new to web development and want to create a website easily without dealing with the technical aspects.
- You need fast and reliable support when you face issues.
- You are looking for a great design on the front-end and easy to use content management system on the back-end.
- Your client wants a beautiful and easy-to-use website fast for their travel company or agency.
- You want free demo content that can be imported with a click.
Travel Company Pro Special Features
- Unlimited Theme Colors
- Unlimited Google Fonts
- Frontpage Ordering
- Banner settings Background Image
- Slider For Home Page
- Video Banner
- Three Different Header(Slider, Image, Video)
- Frontpage/Homepage Layouts With Animation
- Classic Blog
- Classic Blog with Sidebar
- Grid Blog
- Grid Blog With Sidebar
- List Blog
- Custom Contact Page
- FAQ Page
- Service Page
- Single Page For Services
- Team Page
- Testimonial Page
- Trip 3 Columns
- Trip 4 Columns .
3 Different Header

One Click Demo Import
Step by Step guide
Trip Documentation
WP Travel Engine Dashboard

All Trips: You can view and edit all the trips you have created here.
Add New: You can create a new trip by clicking this menu.
Destinations: You can add a new destination or view/edit all the destinations here.
Activities: You can add a new activity or view/edit all the activities here.
Trip Type: You can add a new trip type or view/edit all the trip types here.
All Bookings: You can view all the new and old bookings here.
All Customers: You can view all the new and old customers here.
All Enquiries: You can view all the enquires made using the enquiry form here.
Settings: You can modify different trip settings like checkout page, terms and conditions page, thank you page, confirmations page, email templates, trip tabs and info, payment settings, and other misc settings here.
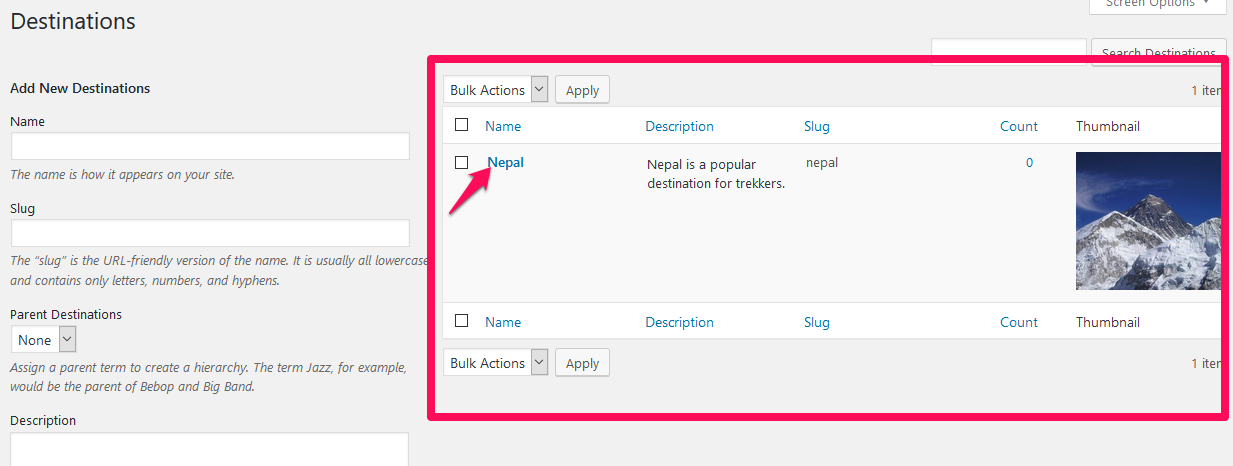
Destinations (Add/View/Modify)
You can add trip destinations along with an image. Destinations can be countries or cities. The “Count” shows the number of trips on a particular destination.

Adding Destinations
Recommended Image Size for Destinations: 300 x 275 px
- Go to Trips > Destinations.
- Enter the name, slug, and description of the destination. The description of the destination is displayed on the single destination page. The single destination page displays all the trips associated with the destination.
- Upload an image for the destination. The image will be displayed as a thumbnail in the destinations archive page.
- Click on Add New Destinations button

Editing Destinations
- Go to Trips > Destinations.
- Click on the destination you want to edit. A new page will be loaded.
- Click on Update after making necessary changes.
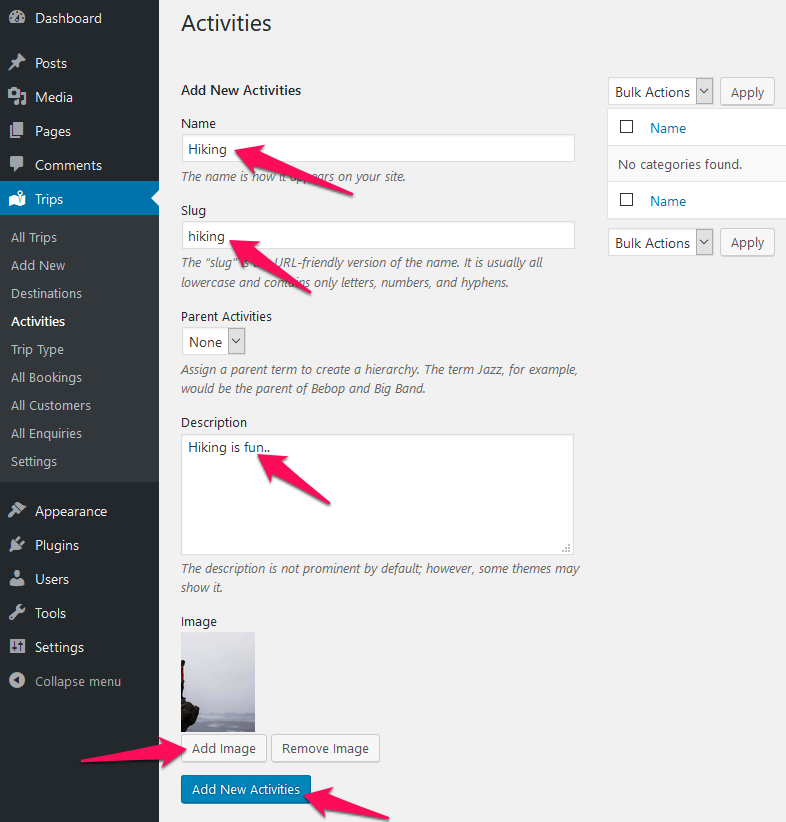
Activities (Add/View/Modify)
You can add trip activities along with an image in the theme. Activities can be hiking, skydiving, surfing, etc. The “Count” shows the number of trips on a particular activity.

Adding Activities
Recommended Image Size for Activities: 300 x 405 px
- Go to Trips > Activities.
- Enter the name, slug, and description of the activity. The description of the activity is displayed in the single activity page. The single activity page displays all the trips associated with the activity.
- Upload an image for the activity. The image will be displayed as thumbnail in the activity archive page.
- Click on Add New Activities button
Editing Activities

- Go to Trips > Activities.
- Click on the activity you want to edit. A new page will be loaded.
- Click on Update after making necessary changes.
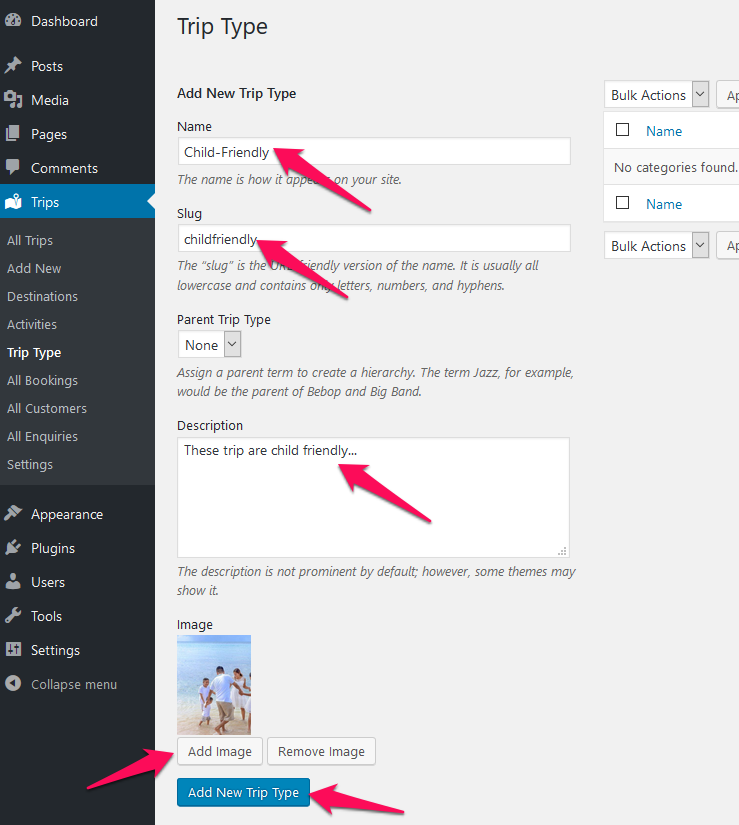
Trip Type (Add/View/Modify)
You can add trip types along with an image in the theme. Trip types can be Budget Friendly, Child-Friendly, Dog-Friendly, Easy, Difficult, etc. The “Count” shows the number of trips on a particular trip type.
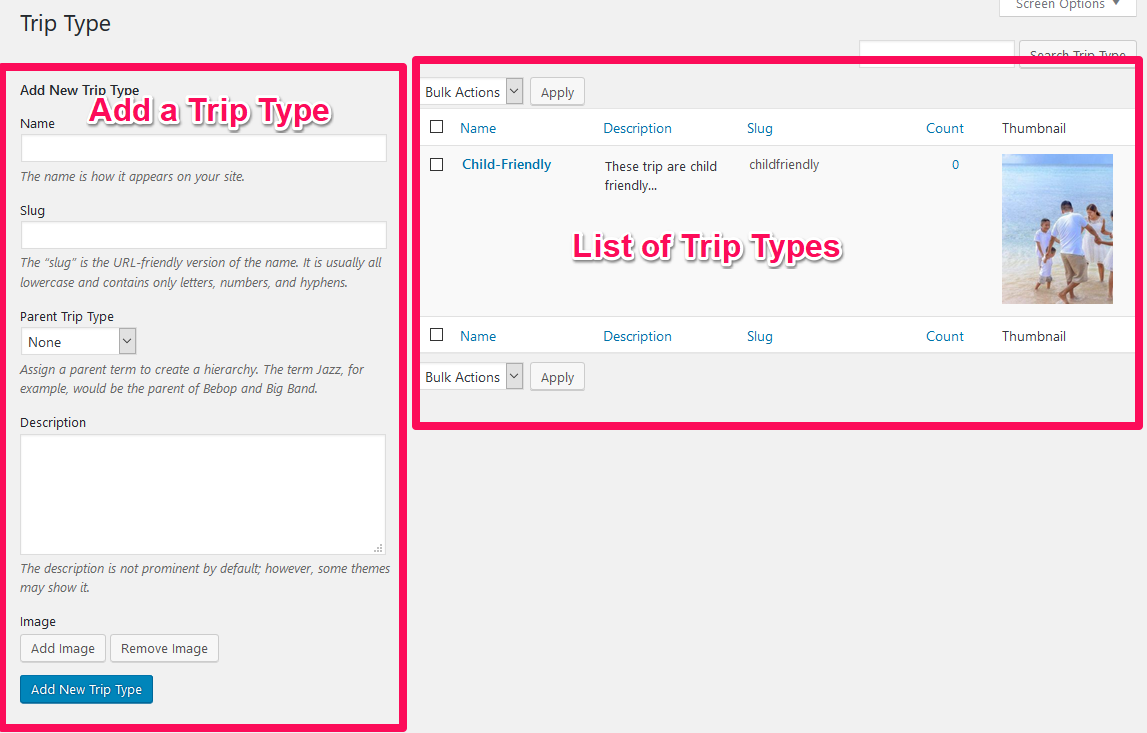
Adding Trip Type
Recommended Image Size for Trip Type: 300 x 405 px
- Go to Trips > Trip Type.
- Enter the name, slug, and description of the trip type. The description of the trip type is displayed in the single trip type page. The single trip type page displays all the trips associated with the trip type.
- Upload an image for the trip type. The image will be displayed as thumbnail in the trip type archive page.
- Click on Add New Trip Type button
Editing Trip Type
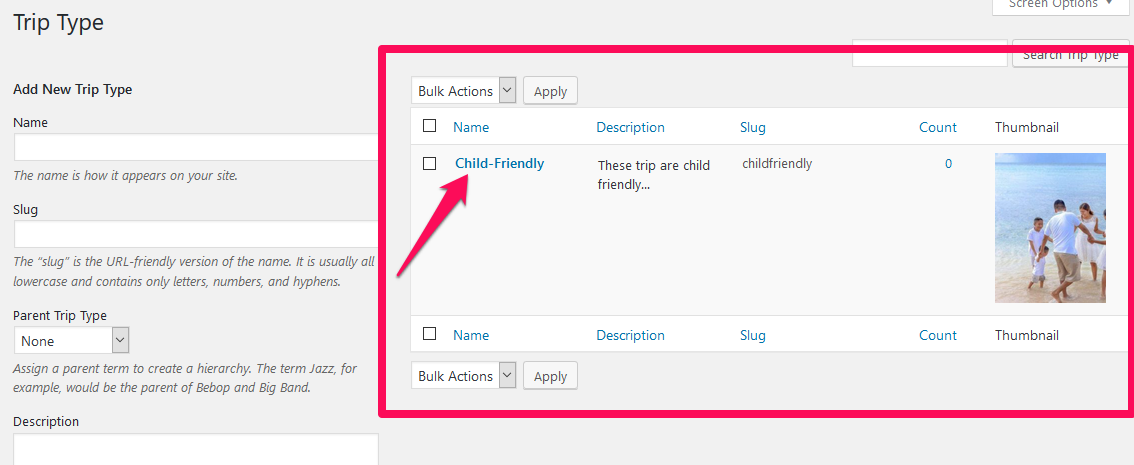
- Go to Trips > Trip Type.
- Click on the Trip Type you want to edit. A new page will be loaded.
- Click on Update after making necessary changes.
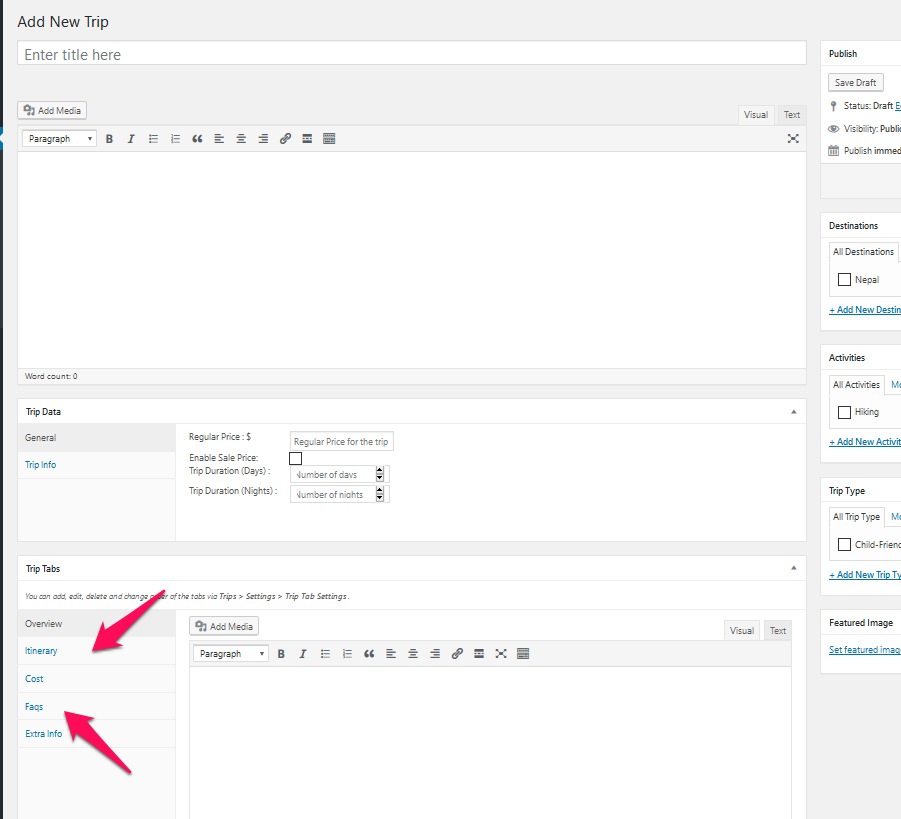
Creating/Adding a New Trip
You can add trip details and assign them to destinations, activities, and trip type while creating a trip.
- Go to Trips > Add New
- Enter the trip name in the title section.
- Enter the trip description in the description section
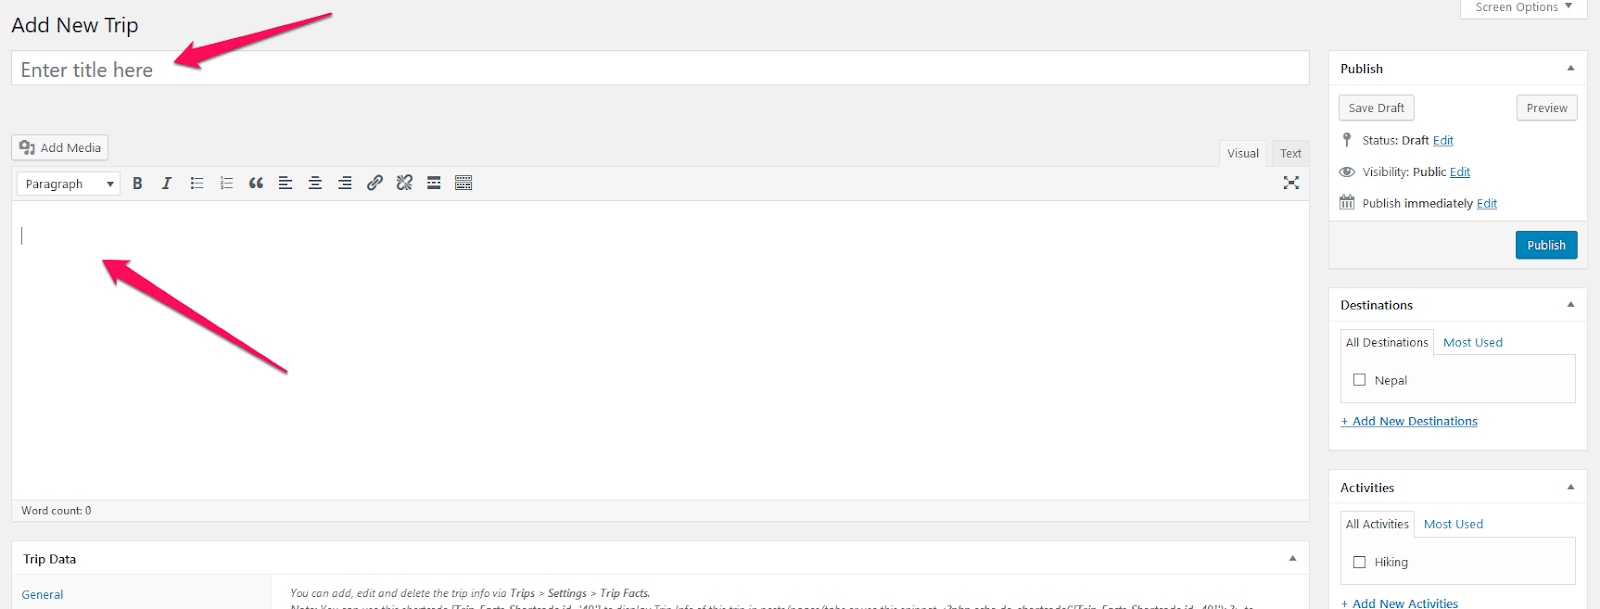
- Enter Trip Data in the Trip data section. You can enter the price, discounted price, and duration of the trip in the “General” tab. You can enter extra trip information like group-size, transportation, etc in the “Trip Info” tab. Choose the Trip Info type and Click on “Add Trip Info” button to add a trip info. You can add more trip info fields from Trips > Settings> Trip Info. Refer to Trip Info setting section of this documentation to add a trip info.[a]
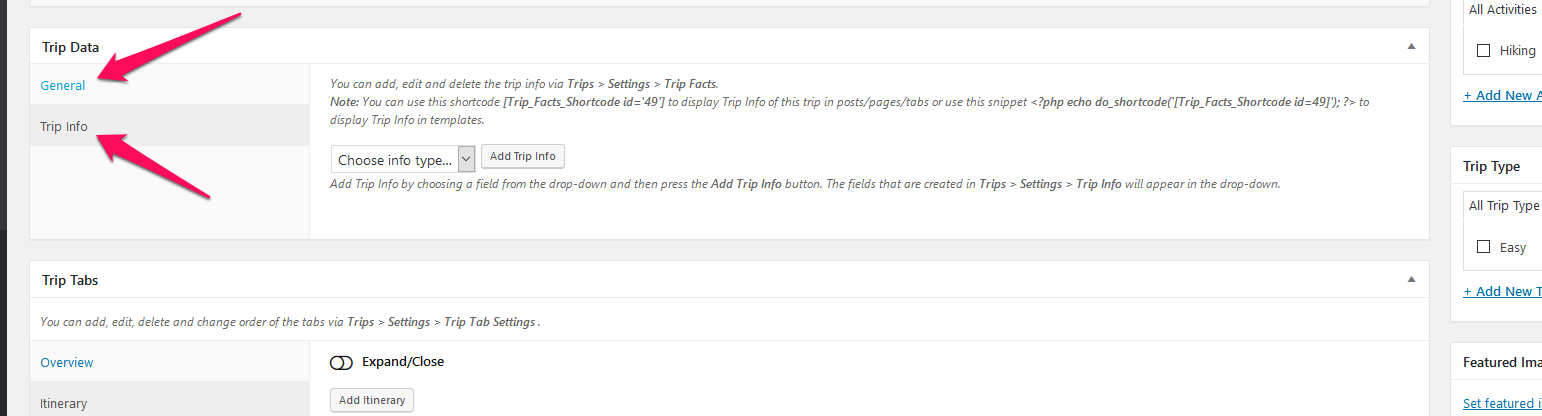
- Enter Overview, Itinerary, Cost, and FAQs of the trip in Trip Tabs section. The tabs will be displayed on the trip page. You can refer to the adding FAQs and Itinerary section of this documentation [b]if you need help. You can also add extra tabs or sort the order of the tabs by going to Trips > Settings> Trip Tab Settings. Refer to Trip Tab setting section of this documentation to configure/add trip tabs.[c]
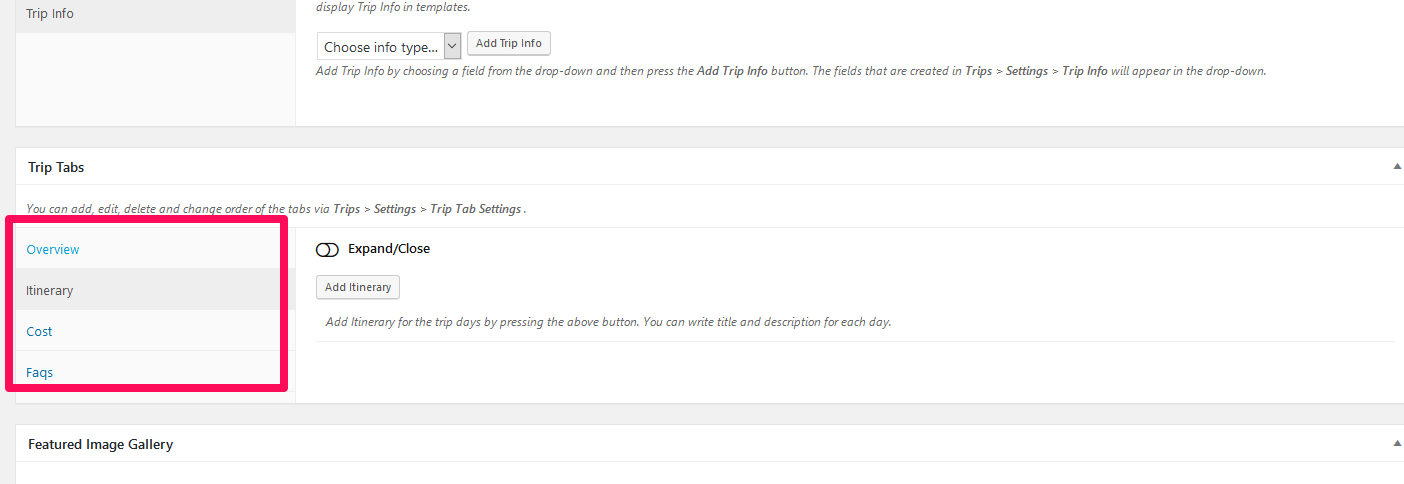
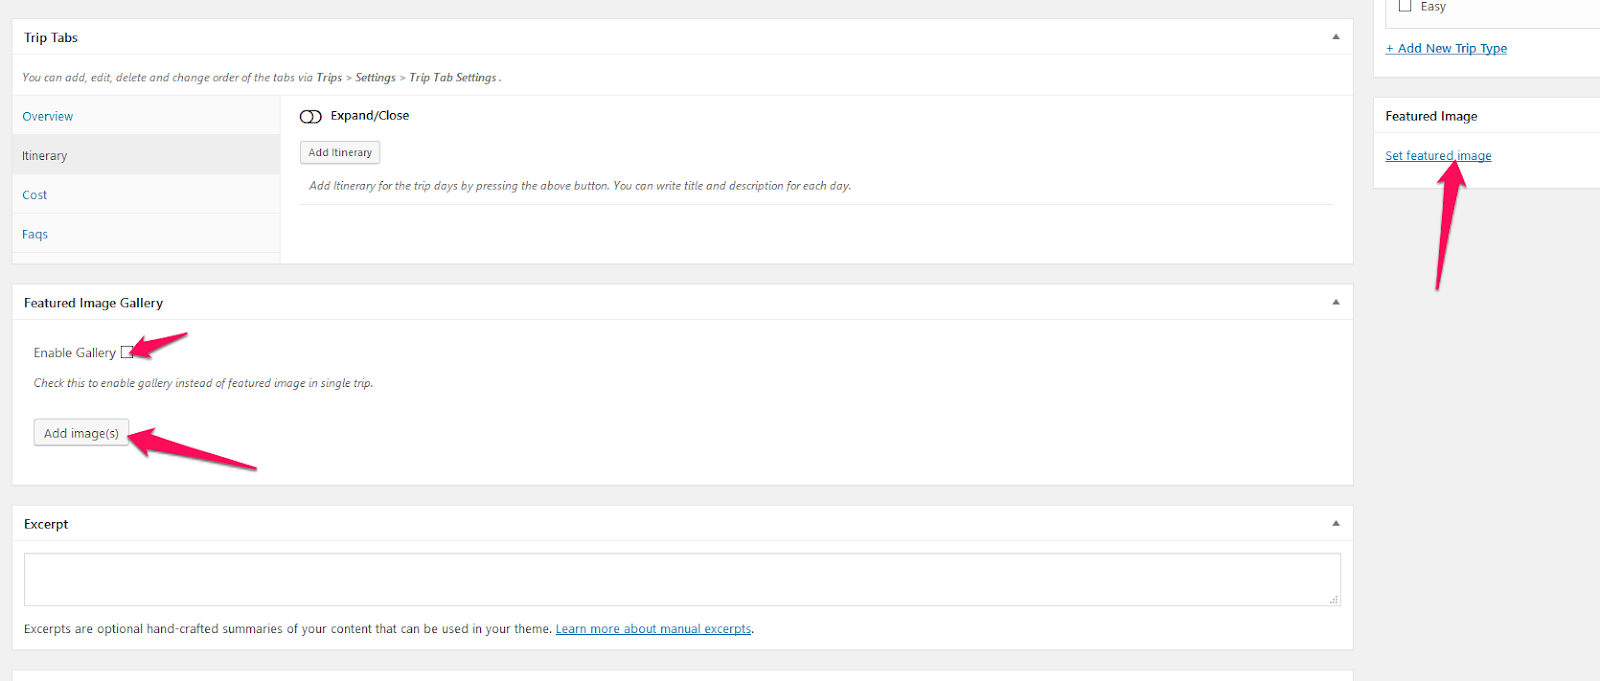
- Upload Featured Image for the trip in Featured Image section. You can also display gallery instead of a single featured image. To enable gallery, check “Enable gallery” in Featured Image Gallery section and add images.
- Assign Destination, Activities, and Trip Type for the trip. The trip without destination will not be displayed.
- Click Publish

Adding FAQs and Itinerary on the Trip Page
You can add FAQs and Itinerary on the trip page when you create the trip. You will find the option to add FAQs and Itinerary in the Trip Tabs section while adding a new Trip.
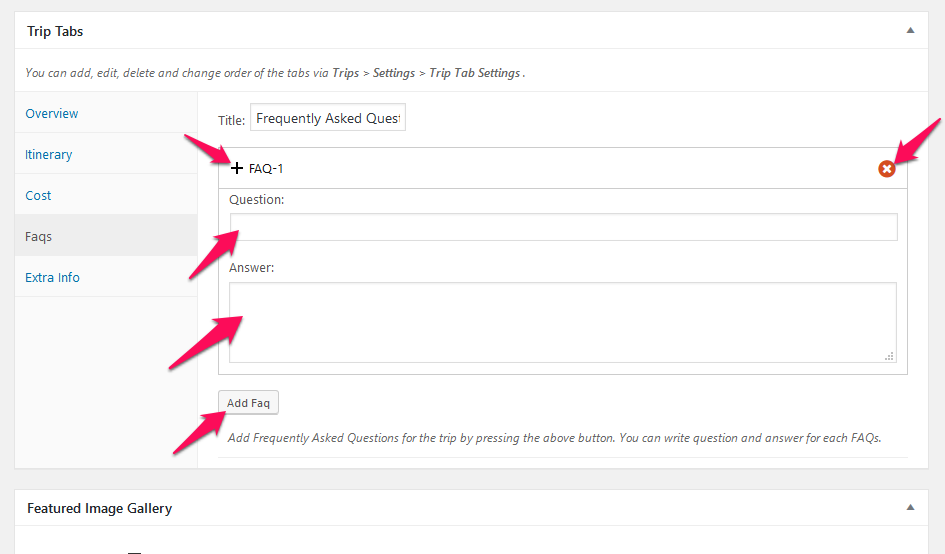
FAQs Setup
- When you create a new trip, in the Trip Tabs section, click on Faqs tab.
- Enter the Title and Click on “Add Faq” button. The title will be displayed when users click the FAQ tab on the trip page
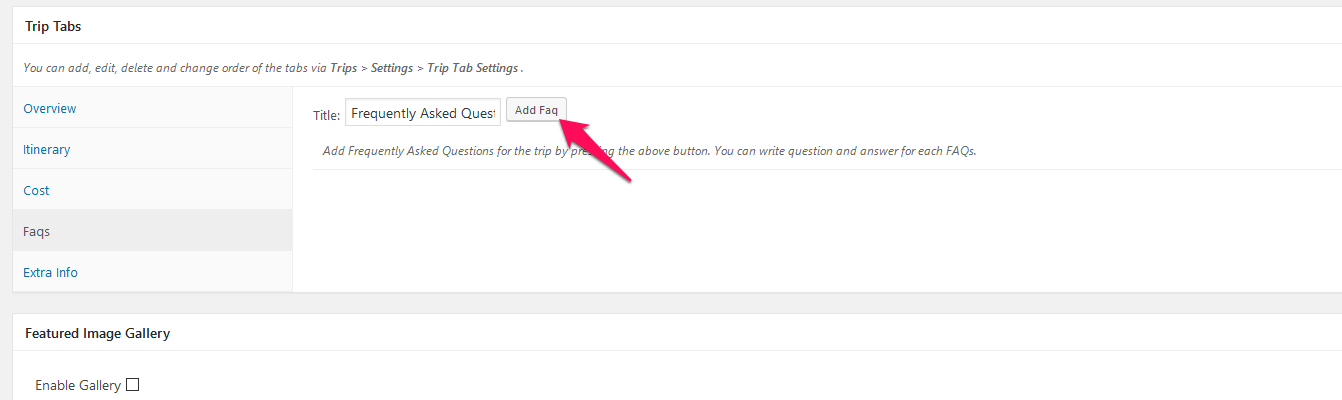
- Enter the Question and Answer
- Click on “Add Faq” to add more questions and answers. Click on “Cross” icon to delete a question. Click on “+” icon to collapse a question.
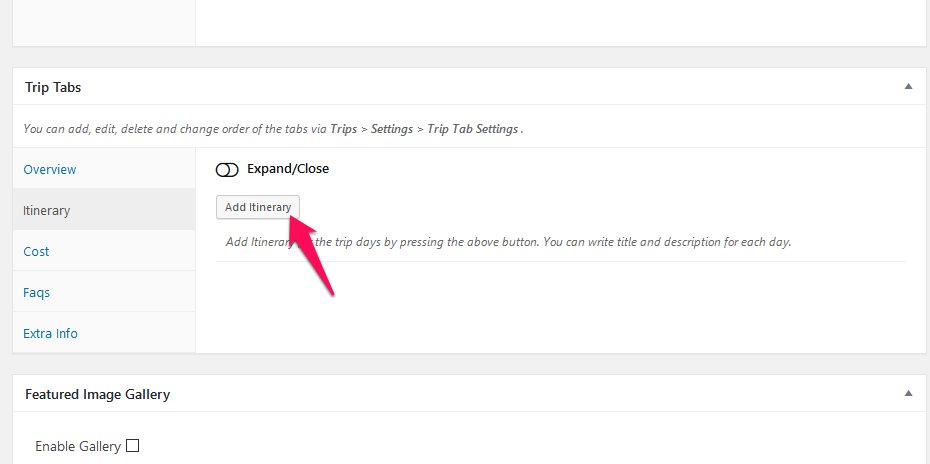
Itinerary Setup
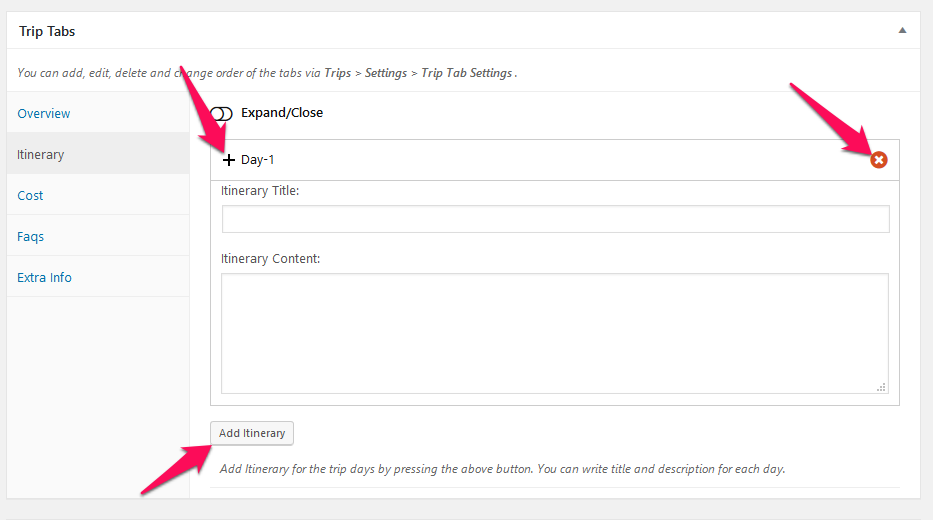
- When you create a new trip, in the Trip Tabs section, click on Itinerary tab.
- Click on “Add Itinerary” button. The title will be displayed when users click the Itinerary tab on the trip page.
- Enter Itinerary Title and Content for each day.
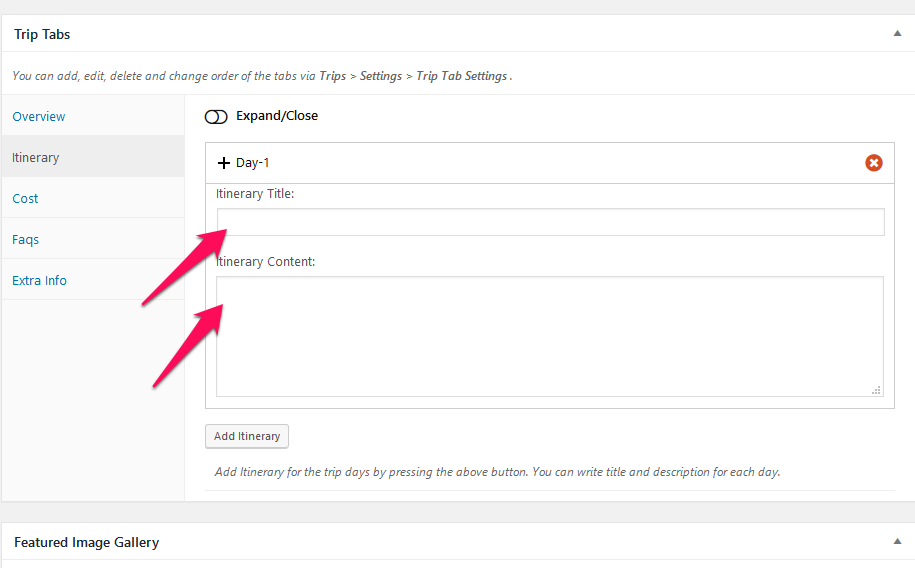
- You can add days by clicking on “Add Itinerary”. Click on “Cross” icon to delete a question. Click on “+” icon to collapse a day.
Trip Includes and Trip doesn’t Include settings
You can define what services you provide for the trip and what you don’t provide while creating a trip.
Select the trip from Trips > All Trips or create a new trip from Trips > Add New. On the Trip Tabs section, click on the “Cost” tab. Enter the information.

Trips Settings (Configuring Trips)
You can configure your trips like creating Checkout, Terms and Conditions, Thanks, and Confirmation Pages, creating email templates, managing payment methods and adding extensions from Trips > Settings
General Settings
You can assign pages, add/configure trip tabs, and add trip info in this setting.
Page Settings (Create/Select Checkout Page, Terms and Conditions Page, Thank You Page, and Booking Confirmation Page)
- Go to Trips > Settings> General> Page Settings
- Select the pages for checkout, terms and conditions, thank you, and booking confirmation. If you don’t have pages, you can create one from Page> Add New in WordPress dashboard. Once you create pages, you may need to add the below-mentioned shortcodes in the description of the page.
- Click “Save Changes”

Shortcodes For Pages:
For Checkout page: [WP_TRAVEL_ENGINE_PLACE_ORDER]
For Thank You Page: [WP_TRAVEL_ENGINE_THANK_YOU]
For Confirmation Page: [WP_TRAVEL_ENGINE_BOOK_CONFIRMATION]
Trip Tab Settings (Add/ Modify Trip Tabs on Trip Page)
- Go to Trips > Settings> General> Trip Tabs Settings
- Click on “Add Tab” to add a new tab.
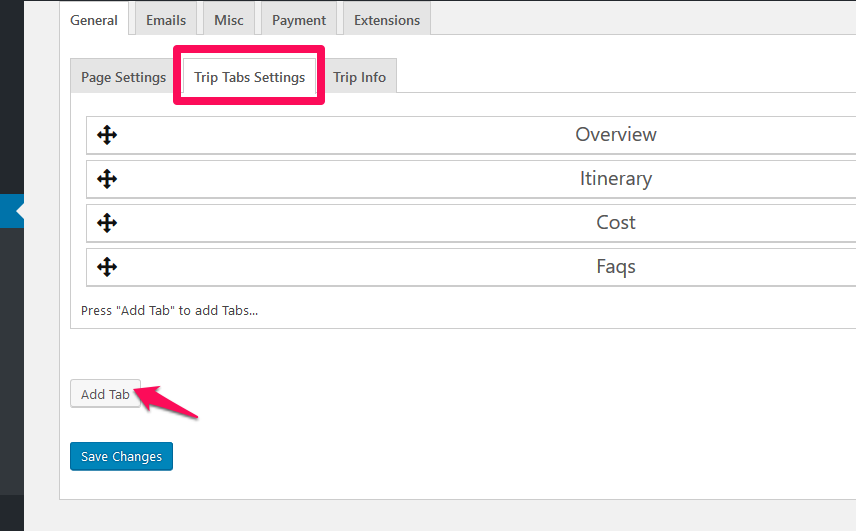
- Enter Name for the Tab (eg. Faq) and Add an Icon for the tab.
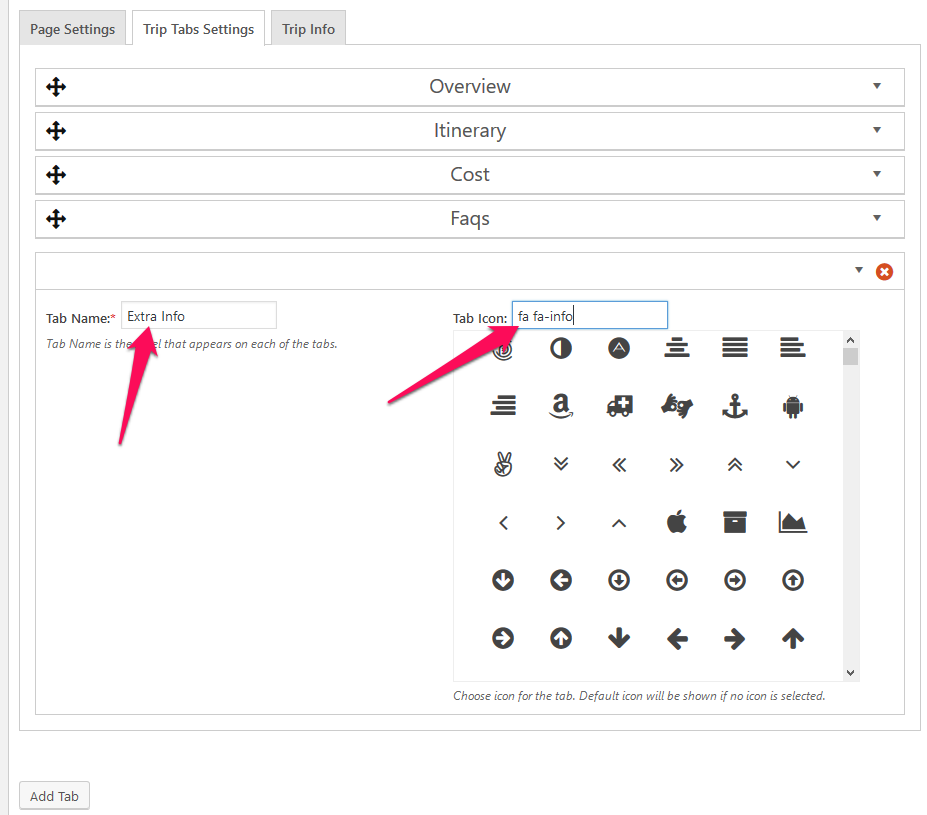
- Click “Add Tab” to add more tabs. Click on Cross icon to delete a tab. Click and drag on the Move icon to rearrange the tabs.
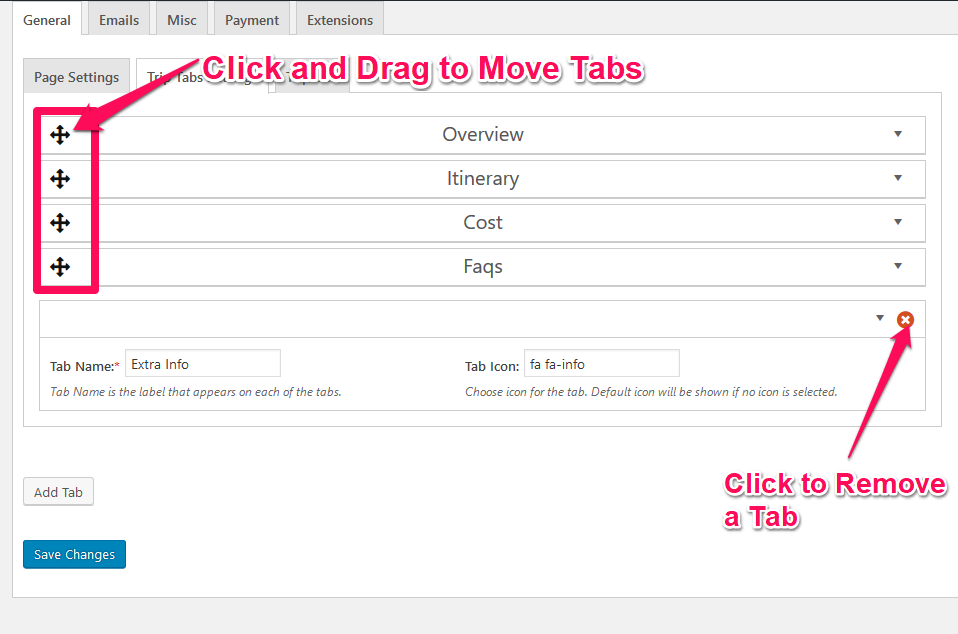
- Click Save Changes to save your changes.
Trip Info (Trip Facts) Settings (Add/Modify Trip Infos)
You can add your own trip info fields on the trip page. WIth Trip Info fields, you can add extra information like transportation, group-size, etc. with icons on the trip page.
- Go to Trips > Settings> General> Trip Info
- Click on Add Field to add a trip info field
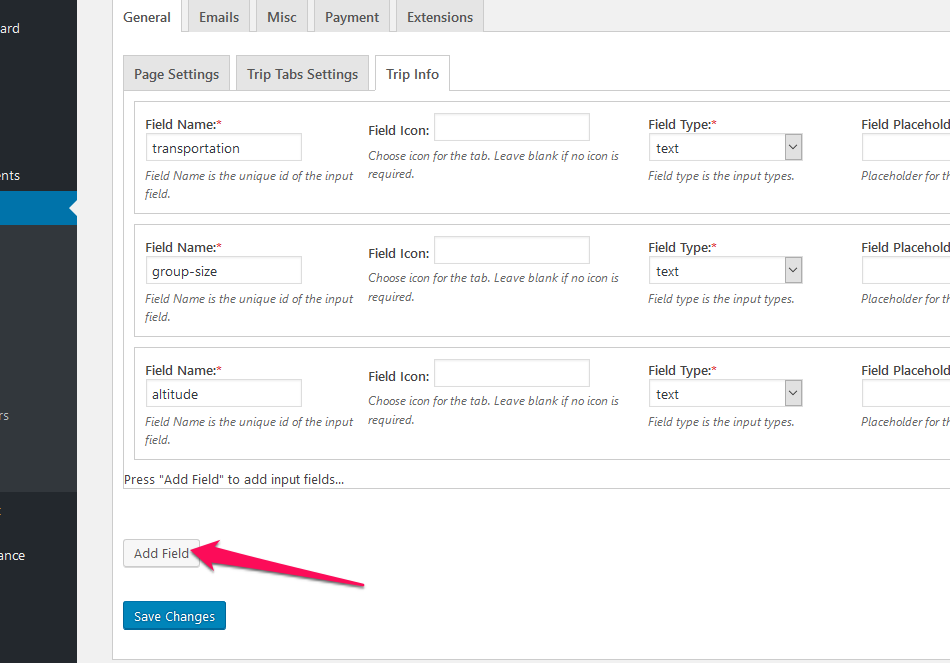
- Enter the Field Name, Icon, Type, and other required fields.

- Click “Add Field” to add more trip info fields. Click on Cross icon to delete a field.
- Click Save Changes to save your changes
Email Templates
You can modify the content of Purchase Receipt and Booking Notification that is received by the customers.
- Go to Trips > Settings> Emails
- Click on the template you want to modify
- Enter the required fields
- Click Save Changes after you make the changes
Email Template Tags: Enter the following tags as required in your email template.
{trip_url} – This tag shows that the trip URL of the trip booked by the customer.
{name} – This tag displays the buyer’s first name
{fullname} – This tag displays buyer’s full name– first and last
{user_email} – This tag displays the email address that the customer used to book a trip.
{billing_address} – This tag displays the buyer’s billing address.
{tdate} – This tag displays the starting date of the trip.
{traveler} – This tag displays the total number of traveler(s) that the customer booked the trip for.
{tprice} – This tag displays the trip price of a single traveler.
{price} – This tag displays the total price of the booking.
{sitename} – This tag displays the name of your website.
{ip_address} – This tag displays the IP address of the customer.
Misc Settings
You can change currency, book now button label, enquiry thank you page, and booking confirmation message in misc settings.
- Go to Trips > Settings> Misc
- Select the currency, enter the book now button label, enter the subject for the enquiry received email, select an enquiry thank you page, and enter the booking confirmation message.
- Click on Save Changes
Payment Settings
You can define advance payment and payment method (Pro version only) in this setting. To change the currency of the payment, please go to Misc Settings.
- Go to Trips > Settings> Misc
- Enter the advance payment in percentage. The customer will have to pay a certain percentage of the trip cost to book a trip if you define an advance payment.
- Enter the payment method– Paypal or Stripe (This feature requires you to add a paid extension. You can get it at WP Travel Engine’s website.
- Click Save Changes
View/Manage Bookings
You can view/edit bookings from Trips > All Bookings
You can see the Booking ID, booking date, trip ID of the booking, Trip Name, Number of Travellers booked, and Total Cost of the booking. To see the details of the booking, click on the booking title.
View/Manage Customers
You can view/edit new and old customers from Trips > All Customers
You can see the email of the customer, customer ID, customer’s country, number of booking made by that customer, and total money spent by the customers. To see the details of a customer, click on the email address.
Email address is used to track the customers.
View/Manage Enquiries
You can view/edit enquiries from Trips > All Enquiries
Download